Monthly Archives: November 2007

Fold-Out Book Tutorial

I recently made this cute mini book:img_3210.jpg

The pages all fold out to reveal what’s underneath.  Here’s what it looks like with the pages foldet out (this was taken before I finished the details/embellishments, but you get the idea!):

img_3209.jpg

So, here’s the step-by-step instructions on how to make your own.  You can make this any size you want and you can make as many or a few flaps as you want.  All you need for the basic book is cardstock and a sewing machine (threaded of course!)

(In the tutorial, click on the thumbnails to enlarge the pics!)

Start by deciding how big you want your finished project to be.  Cut one piece of cardstock to this size.  This is piece #1 in the photo below.  The sizes of the other pieces are determined by the size of your #1 piece, so that the edges line up evenly.   Cut your desired size flaps (#’s 2, 3, 4, 5 in the photo below).  This is an example of what you’ll  have at this point:

img_3184.jpg

Set your sewing machine to a wide zig-zag stitch.  Place your piece #1 and piece #2 under the machine’s foot making sure that the edges line up perfectly and that the ‘seam’ of the two papers is right in the center. 

img_3185.jpg 

Do not overlap the two pieces, just be sure they are ‘butted’ up to each other well.  Leave a few inches of thread hanging and start sewing your zigzag stitch, making sure that the stitch is cathing both pieces of paper. 

img_3186.jpg

Sew all the way to the end of piece #2.  Then, turn your piece and add piece #3 and continue in the same manner until you have all four pieces sewn on the piece #1.  You will end up at the same point on piece #1/#2 where you started sewing:

img_3188.jpg 

Leave a tail of thread: img_3192.jpg and tie the threads from each side together to form a knot: img_3193.jpg trim off the ends.

Now your piece should look like this: img_3194.jpg and because we butted the pieces up next to each other and used a zig zag stitch, you can fold the flaps in: img_3198.jpg

Now it’s time to decorate your book…use your imagination!  Here are my finished flaps:

#2  img_3211.jpg  #3img_3217.jpg  #4  img_3218.jpg  #5 (I also stitched a piece of transparency on this piece) img_3220.jpg 

Then, to make the closure for the book, you’ll need to hand stitch a button to the front of piece #2 (the front when the book is closed) and leave a few inches of thread hanging when you tie it off.  Then, stitch another button onto one of the other flaps (I used flap #3 in this case) but go ahead and trim the threads. You’ll used the hanging thread from the top button to wrap around the bottom button to hold it closed.  See this photo:

img_3210.jpg

You can add pictures/journaling to both sides of the flaps too!

Have fun, and please share your finished projects with me if you try it!

**I just realized I didn’t get a picture of the finished piece #1.  I’ll do that tomorrow and post it.

1 Comment

Filed under Uncategorized

Happy Anniversary to us!

Yes, today is the 9th anniversary for my husband and me.  I love him so much…as much, or maybe even more, than I did when we first met….speaking of first meeting, would you like to hear the funny story of how we DID meet?  Well……………..

 We were both working at a country music entertainment place called Renfro Valley.  This place has live country music shows on weekends, and lots of little shops.  He was an entertainer, singing on the “Barn Dance” show on Friday and Saturday nights, I worked in some of the shops there.  We first caught each other’s glare on a Saturday.  He was standing at the front doors of the Old Barn (Where the Barn Dance show is held) just looking out the door in between rehearsals.  This particular day, I was the “runner” – going around to the different shops and relieving the people during their breaks, so I was on the go all day, constantly going from one shop to another.  So, I was walking from one shop, the “Grist Mill”, down to the music store and walked past the Old Barn and looked over toward the doors and saw him standing there looking at me.  We smiled at each other and I continued walking.  I just figured he was being polite, I never dreamed he would ever “like me”, I mean…he was one of the “Stars” of the show!  Like I’d be so lucky, yeah right!

Well, a week or two later after the last show on Saturday night, he came over to the music store where I was working before he left to go home and walked up to the counter and motioned for me to come over.  I thought he must have something he wanted us to order for him or something.  So, I went over.  He was gripping the counter so hard his knuckles were white and he looked down at the counter, never looking at me and said “So, do you have a man or what?”  I said “uh…..no.”  Then he finally looked up at me and said “Well, can I get your phone number and call you sometime?”  Well, I was so excited I couldn’t find a piece of paper quick enough!  He said it was obvious too (how embarassing!), but I did finally find a scrap of paper and gave him my number.    He called me the next day and we talked for quite a while.  We made a date for the next weekend (he lived out of town and only came up to Renfro Valley on the weekends for the shows).  Our first several dates consisted of him coming to my dad’s house, us sitting on the porch swing for an hour or so talking, then going out to eat and coming back to the house and sitting on the porch swing for several more hours just talking.  We were both just content with swinging and talking…we didn’t care about going to movies or doing other ‘date things’…we loved just swinging and talking.   

About two and a half months later, he asked me to marry him, and of course, I said yes!  And only a month and a half after that, we were married!  Yep…we knew each other a mere 4 months before we got married.  I’m sure lots of people thought we were crazy, but both of us knew that we had met the person God intended for us to spend the rest of our lives with.  And we still feel the same way today. 

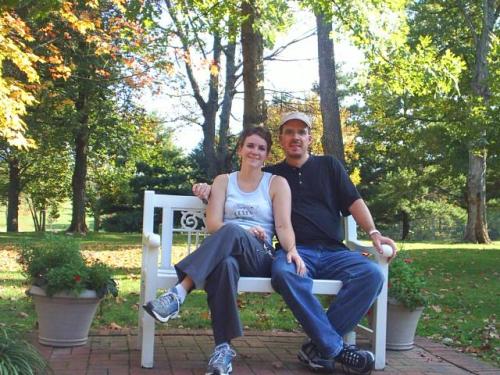
 I don’t even have a current picture of the two of us…but here’s the most recent one I could find…it’s from last year on our anniversary!  I’ll make a point of getting a good pic of us tomorrow!us-on-bench-at-mokh.jpg

Leave a comment

Filed under Uncategorized

Finally back online!

Thanks to a lovely virus, my computer crashed two weeks ago and I just got my computer back last night.  I’m so happy I could scream!  I didn’t realize just how much I depended on this thing until it was gone!

 So, I’ll be catching up on my goings-on over the next few days!

Leave a comment

Filed under Uncategorized

Yay! I got it!

I finally figured out how to add blog links in my sidebar!  Whoop, Whoop!  So, if you’d like to have your added…leave me a comment with your blog address!  I’d love to look at your blogs!

2 Comments

Filed under Uncategorized

Bear with me!

I am trying to figure out how to add links to blogs I like and visit often in my sidebar…I’m not having much luck! So, if the sidebar looks wierd for a while…ignore me!

Leave a comment

Filed under Blogroll

Wedding cake, Iron Chef & other scrappin’ stuff!

I had a wedding cake to deliver today – the main cake plus a groom’s cake…

img_3170.jpg  img_3171.jpg 

And, here’s a card I made for the wedding couple:

img_3166.jpg

 And, here are my Iron Chef entries for this round:

The ‘ingredients’ to be used were Metal, Glitter, Flowers

LAYOUT:

 img_3145.jpg I inked up a CD with alcohol inks then heat embossed it with holographic glitter powder and then stamped flower petals on it to create a flower with it.
The letters “CAM” are chipboard letters covered in crumpled aluminum foil and then inked and embossed with the same holographic powder.  The rest is pretty self-explanatory i think!

CARD:

img_3027.jpg  I dry embossed aluminum foil with a flower design for the background piece, then inked it with some black to show dimension.  The flowers are covered in glitter, the ribbon has glitter on it, and the tag was de-embossed with “thank you”.

ALTERED CLIPBOARD:

img_3129.jpg The tags hanging from the bottom are metal, and are attached with little metal keyring things.  The rest is pretty easy to see…except that there is glitter over the entire thing, but you can’t tell in the pic.  😦

Here’s a few other cards I’ve done in the last coupla days – one of these I’ll be using for a DT call application, but can’t decide which one…what would you do????

img_3176.jpg img_3178.jpg

4 Comments

Filed under Uncategorized

Trick or Treat!

These two are a treat to my eyes!  Aren’t my little kiddos cute?  🙂

 img_3059.jpg  img_3070.jpg

My little Princess, and my Houston Astros “Josh Anderson” player!  Oh, they were so cute!  And had a blast out collecting candy from all the neighbors.  Did I dress up?  Yeah…I went as a tired mom!  He he!

2 Comments

Filed under Uncategorized